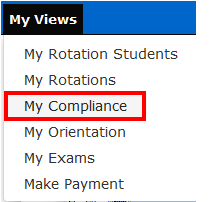
Reaching the My Compliance Page
You can reach your
My Compliance page by clicking on
My Views menu at the top of the
Homepage.
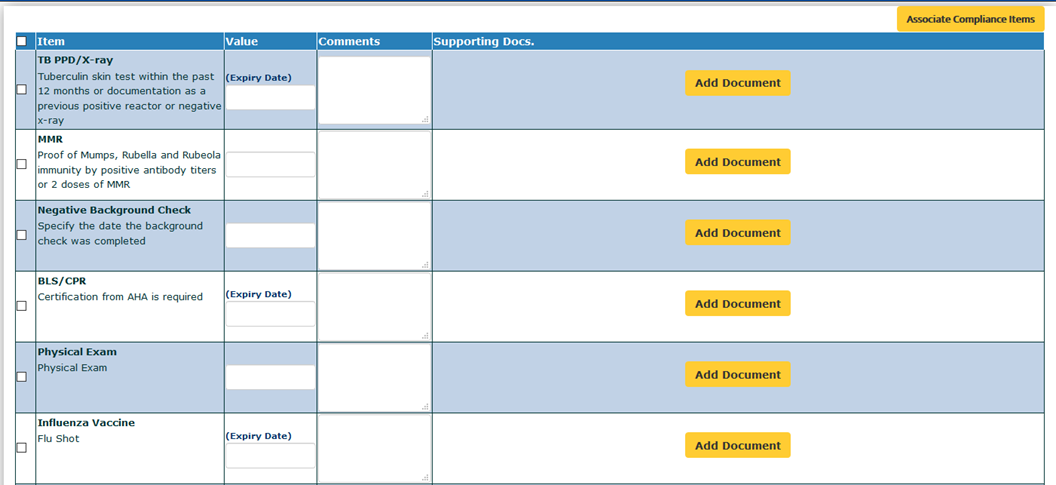
Whichever method you use, you will be taken to a page that looks something like the image below.
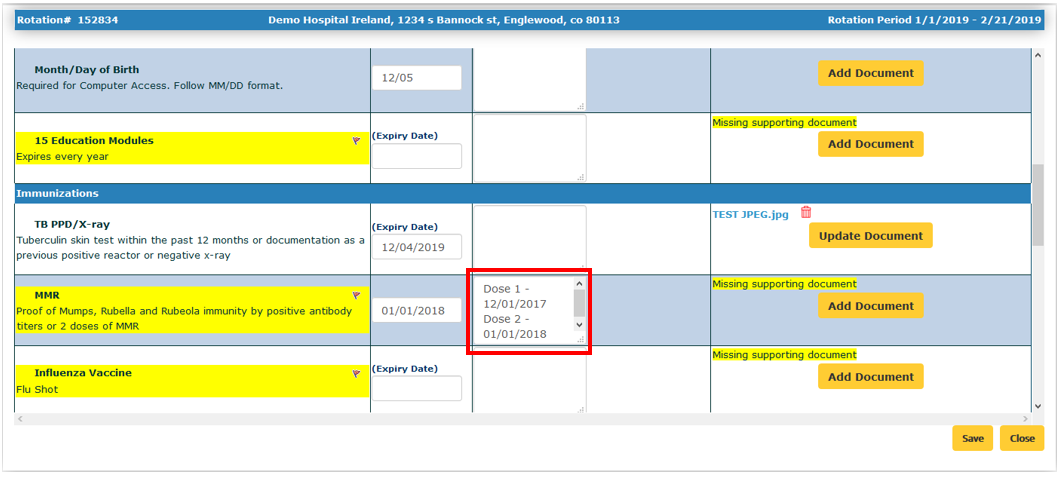
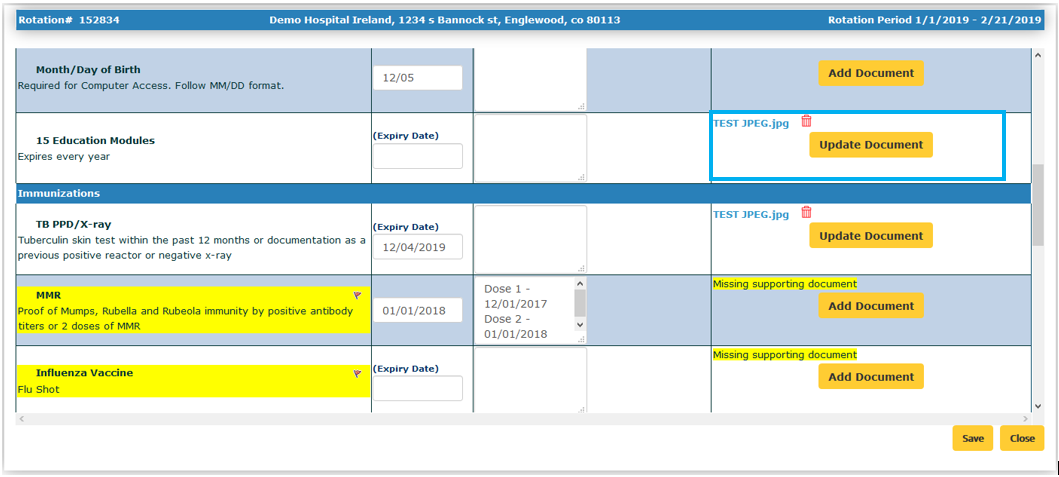
This page displays the checklist requirements and the values that are currently uploaded against the various items.
Updating Values
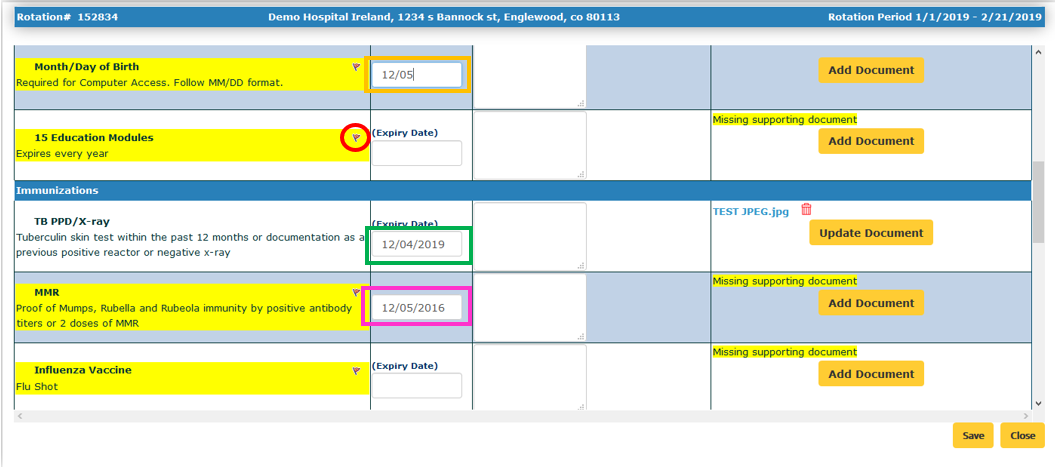
Items that are highlighted and marked with a Red Flag have either a value or document missing, are expired, or are going to expire. The Red Flag serves as the indicator that the item is not in compliance, and will need to be updated.
There are three types of values in the system:
Date Values - These items require a date in which the item was done, or completed.
If there is no calendar, you may also enter alpha-numeric characters as needed.
Text Values - Requires a free-text value (numbers, yes/no, etc.)
Renewal Date Values - These items require the date that the compliance item will expire NOT the date in which the item was done or completed.
Once you've added the proper information to the Comments box, click Save before moving on to the next step.
Comments
This area is usually optional, but sometimes the item will need Additional Information that can be entered in this column.
Once you've added the proper information to the Comments box, click Save before moving on to the next step.
Updating Documents
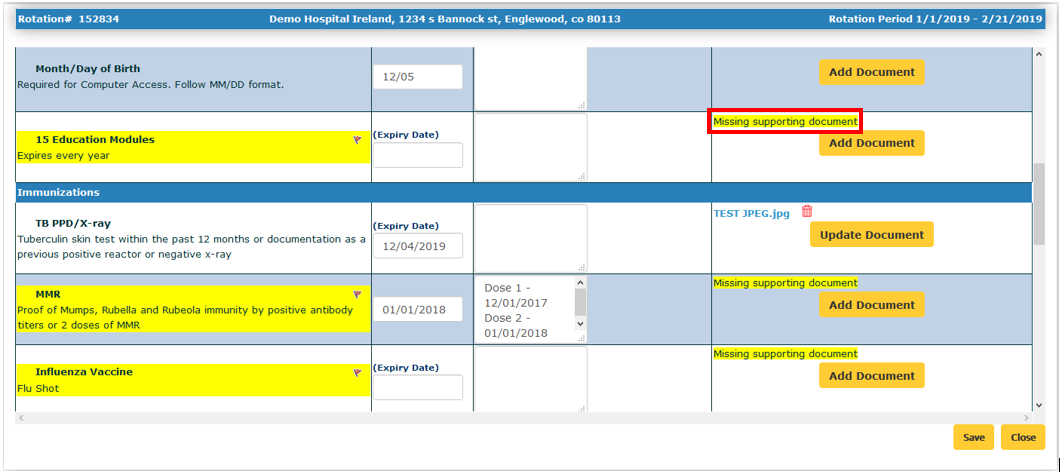
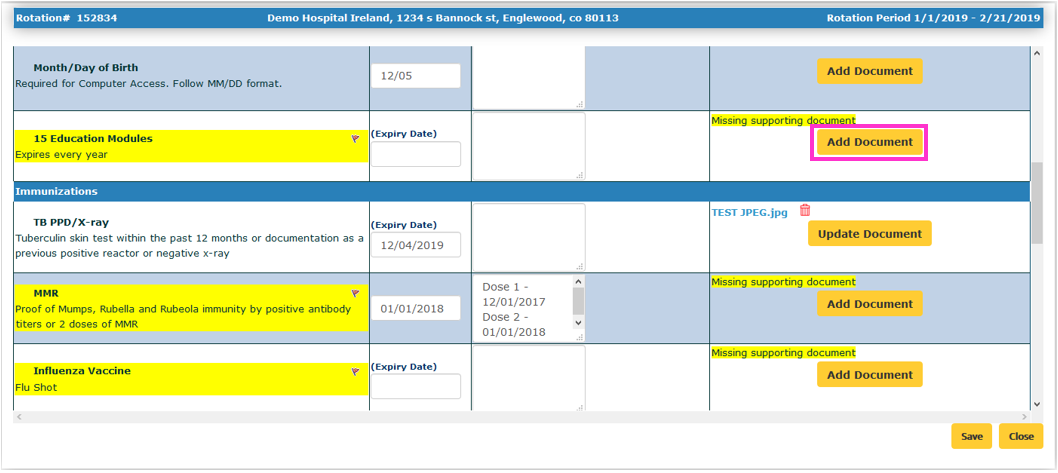
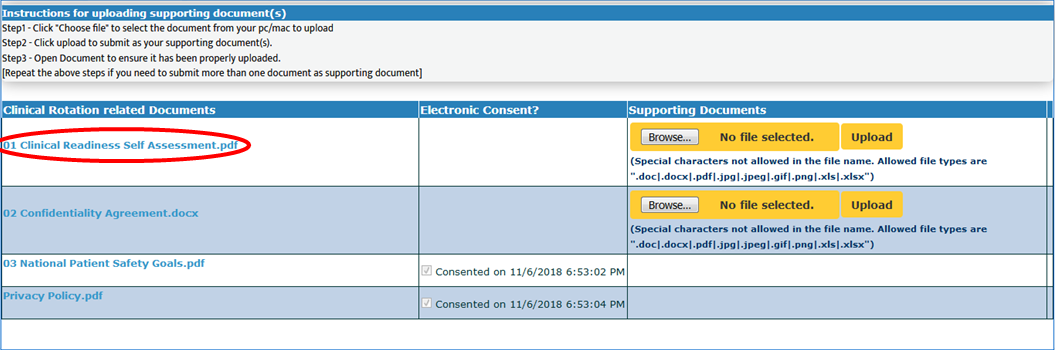
Some items may also require a Supporting Document to be uploaded against them.
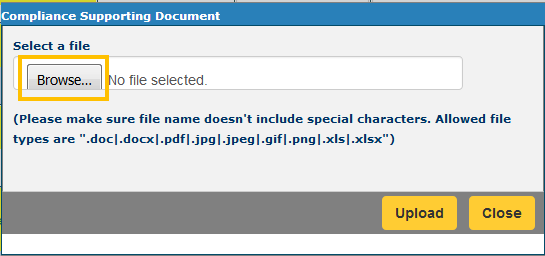
To add a document, click on the Add Document button in the Supporting Docs. Column.
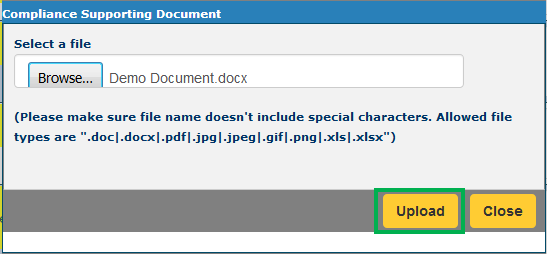
Select Browse to open your file explorer and select the document you want to upload.
Once you've selected your document, click Upload to finish the process.
Once the upload is completed, the Supporting Docs. column will display the Document Title, and will give you the option to Remove the uploaded document using the red trash can.
Note: Each compliance item can only host one document at a time. If you have multiple files to be set against an item, you'll need to merge them into a single file before uploading.
Repeat this process for all items that require a supporting document. You do not need to Save documents after uploading. 
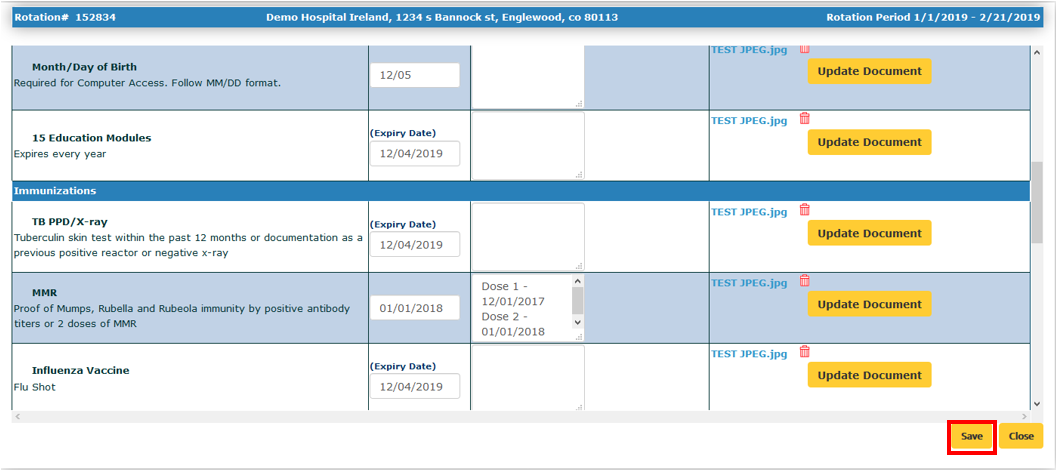
Saving Changes on the Checklist
Once the required items have had the appropriate Values and Documents added to them, you're ready to Save.
Once you save information on the checklist, that information will be automatically shared with the Hospital.
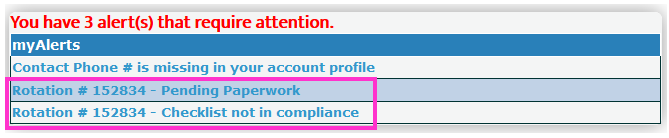
Pending Paperwork
Then click on the word Pending.
Accessing your Documents
To access a document, click on the document's title in the left-hand column.
This will prompt a download that, when complete, will ask you if you want to save or open the file.
We recommend saving all documents to a secure hard drive, then opening it from your desktop.
Types of Documents
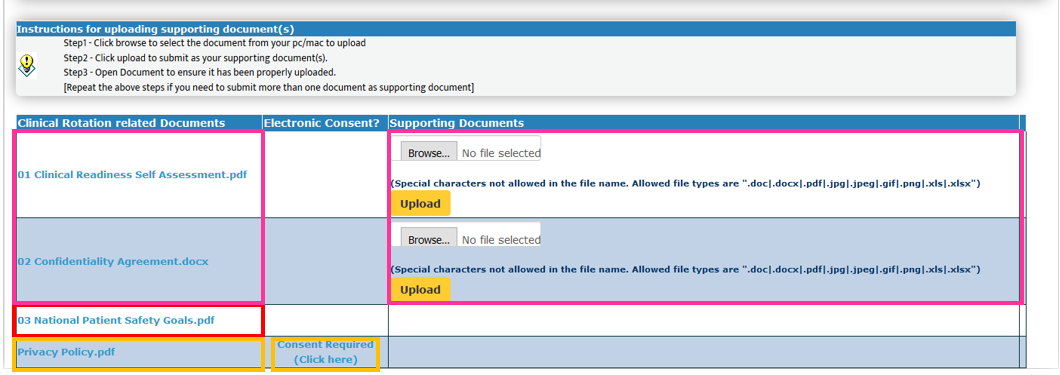
There are three types of documents in this section:
Read-Only - These documents do not require any further action from the user.
Support - You are expected to read the document and then use the "Upload" function to upload a signed copy and/or separate supporting document(s) against the requirement. Documents that you upload against will display the supporting document in the far-right column.
Consent - This type requires you to read and agree electronically sign your agreement to the terms of the document. Click the "Consent Required" text to sign off on these items. Documents that you consent to will display the date and time of consent.